3D Model Designer Features
With our 3D model designer, you can create complex 3D objects using a simple set of tools. Here are some of the designer's features, as well as how to fine-tune the configuration properties of each tool:
Select Tool
The Select Tool allows you to select, move, rotate, and scale an object on the drawing canvas by simply selecting it and using the various buttons to manipulate the object.
There is also a configuration button in the top-left corner of the selected object that allows access to the different configuration properties that control how the object is rendered. Common settings such as Depth, Fill, Background and more can be set from here. All the available object properties are listed below in more detail.
Text Tool
Text can be added to your 3D scene by simply clicking the Text button in the toolbar. Once clicked, some sample "Hello World!" text will be added to the canvas, which can then be edited by clicking the configuration button at the top-left of the newly placed text. The text can be changed by editing the Text field within the configuration panel. Other properties, such as Font, Size, Italic and Bold can be adjusted to alter the appearance of your text.
ImageToSTL Text in the Permanent Marker font
The text is inverted by changing its fill and background colors
A 3D preview of the text
Creating Inverted Text
Creating inverted text is simple. With normal text, the background is set to Transparent. To invert the text, you can simply set the background color to the color you wish the background to be and set the Fill color to Transparent. There are also options to apply padding around the text and rounded corners to the inverted text, as we did in the example above.
Circle Tool
To create solid-filled circles, use the Circle Tool. Once added to the drawing canvas, the radius of the circle and other common properties can be set by clicking the configuration button.
A circle with a radius of 75 mm
The circle is stretched to create an oval
A 3D preview of the circle
Rectangle Tool
The Rectangle Tool is used to create solid-filled rectangles. When added to the canvas, the Width and Height and other common properties can be set by clicking the configuration button. Also available on the properties panel is the option named "Rounded Corners" which allows you to specify if the edges of the rectangle are to be rounded. Separate values can be specified for each corner.
A 150mm x 100mm rectangle
The rectangle rotated right by 40 degrees
A 3D preview of the rectangle
Free Drawing
With the Free Drawing option, you can create 3D shapes by drawing on the canvas with a brush. The brush thickness and fill color are both configurable from the configuration panel on the right-hand side.
Once you have finished drawing, you can click the Finish button to complete the drawing, which can then be selected and modified in the same way as other canvas elements.
A freehand sketch
The sketch rotated to the right
A 3D preview of the sketch
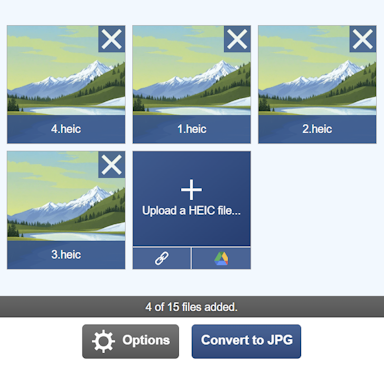
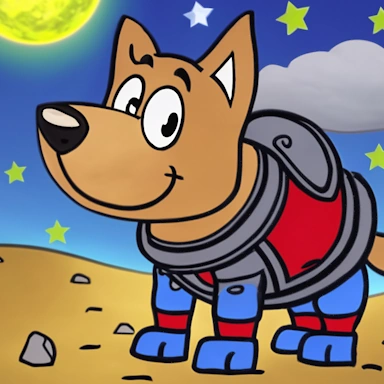
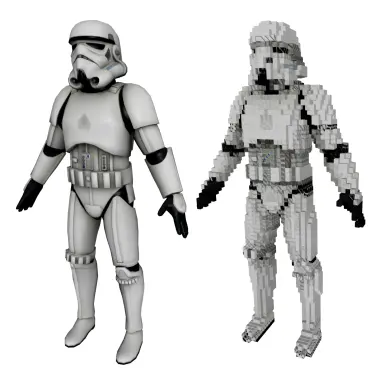
Insert Image
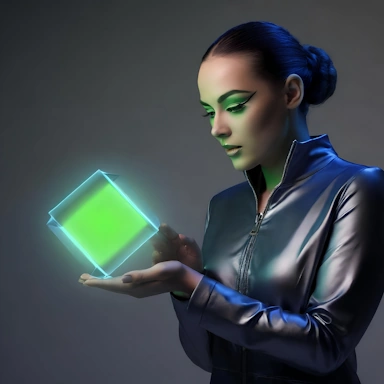
The Insert Image button allows you to upload an image in either PNG or JPG format, which will then be added to the canvas. Once the image has been selected, there are options to remove the background from your image and also to specify whether to Extrude the image or treat it as a Heightmap.
A swirl image file
The image with its background removed
The extruded image with a depth of 15mm
Automatic Background Removal
If the image you upload does not have a transparent background, then the Insert Image tool contains the option to remove the background and replace it with transparency. You can either manually specify what the background color is or leave it to the tool to figure out. There is a Tolerance setting that governs how close a color needs to be to the selected background color before it is removed.
Layers
Like most 2D image applications, layers are supported within our 3D designer and are used to stack items on top of each other in 3D space. This makes it easy to create things like 3D printable fridge magnets, keyrings, and much more.
The layers section allows for the addition and reordering of layers. Each layer will automatically adjust its Z position in 3D space to fit the object with the highest Depth setting. For more advanced purposes, you can also manually set the Z position.
Layer 1 consisting of some inverted text
Layer 2 contains an extruded swirl image
The full Swirltime design preview
In the example above, we have some inverted text on "Layer 1". This text has a large amount of spacing or padding above and a small amount below and to the left and right. Rounded corners have also been specified. For "Layer 2" we have the swirl image used previously, and as "Layer 2" is above "Layer 1", it sits on top, as can be seen in the 3D preview on the right.