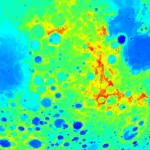
Here is a useful tool for converting heightmap images into full 3D heightmap (or elevation) models. The tool supports color and grayscale images, and you can configure the color properties to fine-tune how your image is interpreted by the tool. Select from one of many 3D model formats to save your heightmap to, such as BLEND Blender, PLY, STL, and many more.
Your file is empty and contains no data. Check your file and try again.
The file you selected cannot be used with this tool.
Based on the file you chose, here are some relevant tools:
Try our new 3D model designer for more advanced options. Try Now!
When using either the Color Extrude or Heightmap options within the Tool menu, you can optionally upload a separate image that can be used to colorize your 3D model.
For more information, please see the Tool Options below.
When the Invert Output option is checked, the pixel brightness is reversed, i.e., black becomes white and white becomes black, resulting in a 3D model that is reversed.
For more information, please see the Tool Options below.
This setting allows you to specify how your image is converted to a 3D model. The Extrude options will extrude your image into 3D space, while the Standard options will apply a heightmap process to your image.
For more information, please see the Tool Options below.
The setting can be used to alter the detail of the final 3D model that is created. The default setting of Medium works well for most Extrude and Heightmap conversions, with the High setting recommended for highly detailed image files.
For more information, please see the Tool Options below.
This setting, when given a height of more than zero, will instruct the tool to add a solid 3D base to the final 3D model. The selected unit of measurement specifies the height of the base.
For more information, please see the Tool Options below.
When this option is enabled, the tool will automatically attempt to make the background of your image transparent.
For more information, please see the Tool Options below.
Manually specify your image background color rather than our tool trying to automatically work it out.
For more information, please see the Tool Options below.
If the tool is unable to identify the background and you know the background color, you can specify it here.
For more information, please see the Tool Options below.
This value can be adjusted to control the background removal tolerance. The higher the value, the more background is removed.
A higher value is useful for creating smoother results if your image is anti-aliased.
For more information, please see the Tool Options below.
This setting tells the tool how to size the final 3D model when using the settings below for Width, Height, and Depth settings.
For more information, please see the Tool Options below.
This setting instructs the tool on how to interpret the color information of pixels in your image, thereby influencing the creation of the 3D model. The grayscale option is most commonly used when working with heightmaps, unless you are dealing with specific requirements that necessitate the use of color.
For more information, please see the Tool Options below.
Use this value to merge similar colors; this is useful if the image is of low quality. A higher number can help reduce the effects of anti-aliasing in the image.
For more information, please see the Tool Options below.
With this setting, it is possible to reduce the inclusion of small holes within the 3D model caused by small, darker areas of the source file, which can be useful in situations where the source image has not been optimized for use with the tool.
For more information, please see the Tool Options below.
When your image file has a transparent background, this option can instruct the tool on how to treat the transparency, with the transparency converted to either black or white.
For more information, please see the Tool Options below.
When this setting is enabled, the conversion tool will attempt to smooth out any "spikes" within the 3D model that are caused by contrasting pixels in the image being in close proximity to one another.
For more information, please see the Tool Options below.
With this option enabled, the tool will mirror the 3D geometry of the generated 3D model along the Z-axis.
For more information, please see the Tool Options below.
If you would like the tool to create a 3D preview of your model, then please select this option. It is on by default.
For more information, please see the Tool Options below.
When your image file has a transparent background, this option can instruct the tool on how to treat the transparency, with the transparency converted to either black or white.
For more information, please see the Tool Options below.
When your image file has a transparent background, this option can instruct the tool on how to treat the transparency, with the transparency converted to either black or white.
For more information, please see the Tool Options below.
Use this option to generate Face or Vertex (Smooth) normals in the final 3D model. Vertex normals give the mesh a smooth appearance. You can choose to not create Normals using the None option to reduce the file size.
For more information, please see the Tool Options below.
The tool uses vertex or face colors to represent color information rather than textures. The advantage of this is that it provides more compatibility with 3D formats that do not support textures. If the 3D model format selected does not support colored vertices or faces, the resulting model will not contain any color information.
If you are waiting for your files to be converted, here are some games to play. No download or installation is required; all games will open in a new browser tab.
The download files have expired; please try again. We delete files converted using our tools after 15 minutes, so please download your files before they expire.